Gel manicures are a popular way to get long-lasting, shiny nails that can stay chip-free for weeks. However, when it comes time to remove the gel polish, it can be a bit of a challenge. While going to a salon is one option, it can be costly, and many people prefer to remove their gel manicures at home.
What Is a Gel Manicure?
A gel manicure is a type of manicure in which a gel-based polish is applied to the nails. Unlike traditional nail polish, which dries through evaporation, gel polish is cured with UV light. This means that the polish hardens and sets in just a few minutes, resulting in a long-lasting, durable finish.
To get a gel manicure, you’ll typically start by having your nails cleaned and prepped. This may involve removing any existing polish, shaping and buffing the nails, and pushing back the cuticles. Next, a base coat of gel polish will be applied to the nails, followed by 2-3 coats of the desired color. Each coat will be cured under a UV lamp for a few minutes before the next one is applied. Finally, a top coat will be added to seal in the color and add shine.
Once the polish is fully cured, your nails will be dry and ready to go. You can expect a gel manicure to last anywhere from 2-3 weeks, depending on factors like your nail growth rate and how much wear and tear your nails experience. When it’s time to remove the polish, you’ll need to soak your nails in acetone for several minutes to break down the gel, then gently scrape the polish off with a wooden stick.
The Benefits of a Gel Manicure
A well-manicured set of nails can add a touch of elegance to any outfit or look. However, maintaining a perfect manicure can be a challenge for many women. Regular nail polish can chip and peel easily, leaving unsightly and uneven nails. This is where a gel manicure comes in as a savior for those who are looking for a long-lasting and flawless manicure. In this article, we will explore the benefits of a gel manicure.
Long-Lasting
One of the most significant benefits of a gel manicure is that it lasts much longer than regular nail polish. The gel formula is designed to adhere tightly to the nail bed, providing a durable finish that can last up to two weeks or more. With a gel manicure, you can enjoy beautiful, well-groomed nails for an extended period of time.
No Chipping
Regular nail polish can chip and peel easily, especially if you use your hands frequently or engage in activities such as housework or gardening. With a gel manicure, however, you don’t have to worry about chipping or peeling. The gel formula creates a protective layer over your nails that is resistant to everyday wear and tear.
Dries Quickly
One of the drawbacks of regular nail polish is that it takes a long time to dry. With a gel manicure, however, the drying time is significantly reduced. Once the nails are painted with the gel formula, they are cured under a UV lamp, which hardens the polish in just a few minutes.
Perfect Finish
A gel manicure provides a flawless, high-gloss finish that is hard to achieve with regular nail polish. The gel formula is designed to be thicker and more viscous than regular polish, which allows for a more even and consistent application. The end result is a perfect, smooth, and shiny finish that is sure to turn heads.
Customizable
A gel manicure is highly customizable, with a wide range of colors, patterns, and designs to choose from. Whether you prefer a classic French manicure or something more adventurous and bold, there is a gel manicure design that will suit your preferences.
How to Remove a Gel Manicure at Home
Here are some steps to follow for safe and effective gel manicure removal at home:
Gather Your Supplies
Before you start, make sure you have all the necessary supplies on hand. You’ll need:
- Nail file
- Acetone
- Cotton balls or pads
- Aluminum foil
- Cuticle oil
Prep Your Nails
Use a nail file to gently file the top layer of the gel polish. This will help the acetone penetrate the polish and make it easier to remove. Be careful not to file too much or too aggressively as this can damage your natural nail.
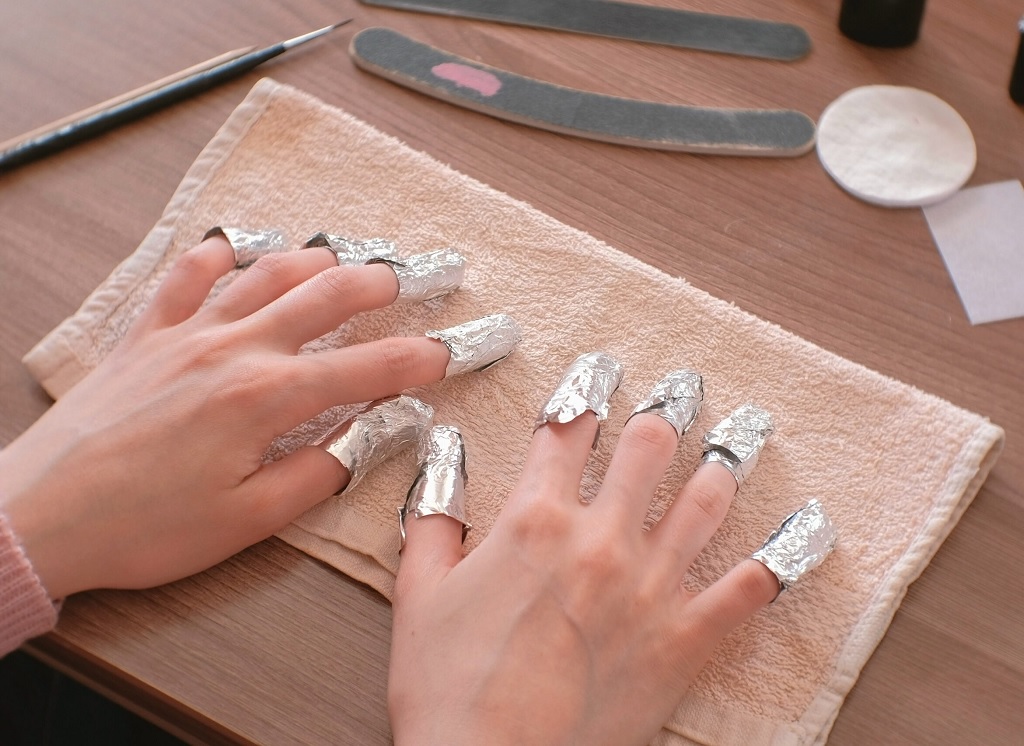
Soak Your Nails
Cut the cotton balls into small pieces, enough to fit on your nails. Soak the cotton balls in acetone and place them on top of each nail. Wrap each nail with a small piece of aluminum foil to keep the cotton in place and to help heat up the acetone. Leave the cotton balls and foil on your nails for 10-15 minutes.
Remove the Foil
Gently remove the foil and cotton balls from each nail. You should be able to see the gel polish lifting off your nails. Use a cuticle pusher to gently push the gel polish off your nails. Be careful not to push too hard or scrape your natural nail.
Moisturize Your Nails
Use a moisturizing nail oil to nourish and hydrate your nails after removing the gel polish. Massage the oil into your nails and cuticles to help prevent dryness and damage.
Repeat these steps as necessary until all the gel polish is removed from your nails. It is essential to take your time and be gentle with your nails to avoid causing damage.
Conclusion
Removing a gel manicure at home can be done with minimal damage to your nails. By following these steps and being patient, you can have clean, healthy nails without having to go to the salon. Remember to take good care of your nails afterward by keeping them moisturized and giving them a break from nail polish occasionally.